
Camera RAW which work like Photoshop for photo processing. Probably not many know that there is a plugin in Photoshop alone like this. This time I will discuss a little bit how to process images using Photoshop Camera RAW.
First open Photoshop!! . Then select File-Open As or with sortcut (Alt + Shift + Ctrl + O).
After that it will open a window Open As, Select the photo you wish to edit. Then the column under Open As, select Camera RAW and finally click Open.

This is the view Camera RAW Photoshop that will be used for photo processing.
- The red box in the upper part tool that is almost similar to the tools
Photoshop like Zoom, Healing brush, Crop, Graduated Filter, WB tool, Rotate etc..
- The red box on the right is used for processing Adjustment photos like Contrast, Exposure, Clarity etc..
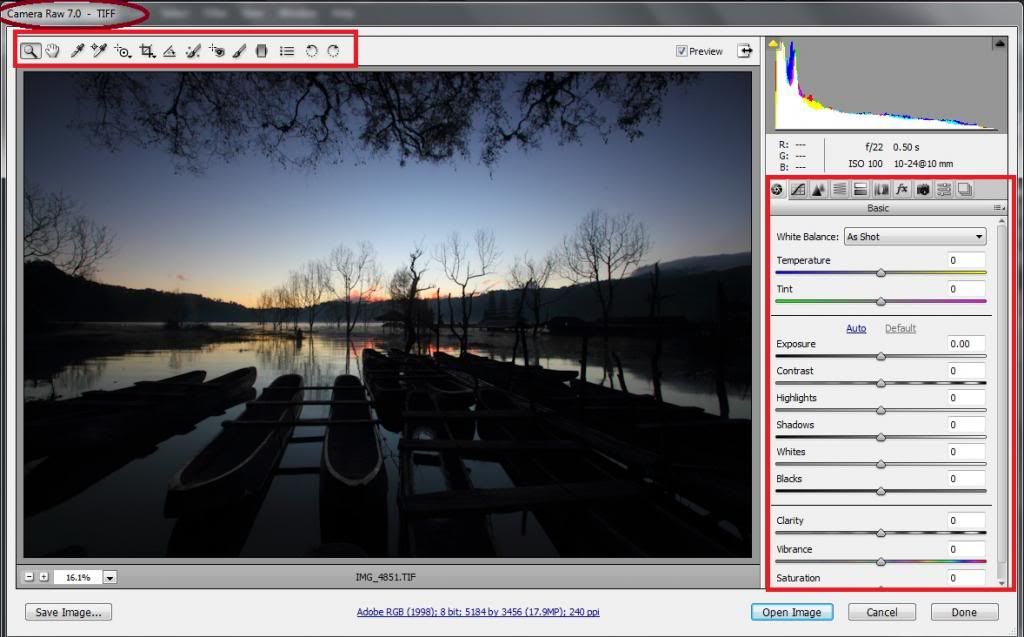
In the basic part indicated by the red circle. Useful to improve the image base, ranging from photo overexposure, underexposure, WB error, saturation etc. Repair.
If had have enough in the processing, click Open Image available at the bottom, then the picture will appear in the window of Photoshop work.
Save the file and then compare it with the previous one.!!
No comments:
Post a Comment